To eliminate confusion over usernames and passwords, some people create local user accounts to make sharing permissions work nicely. You could certainly do this. But Microsoft recommends something simpler: Creating a network file share that’s shared with everyone on your network, thereby avoiding any username and password issues.
- First, consider what you want to share. I recommend just creating a new folder for shared item — I personally created a new folder at C:\Shared Files.
- Next, right-click that folder in File Explorer. Select Give access to > Specific people. If you are using Windows 11, you’ll have to click “Show more options” in the context menu before you see the “Give access to” submenu.
- Now, in the Choose people to share with window, click the little down arrow in the box at the top of the window, select “Everyone,” and click “Share.”
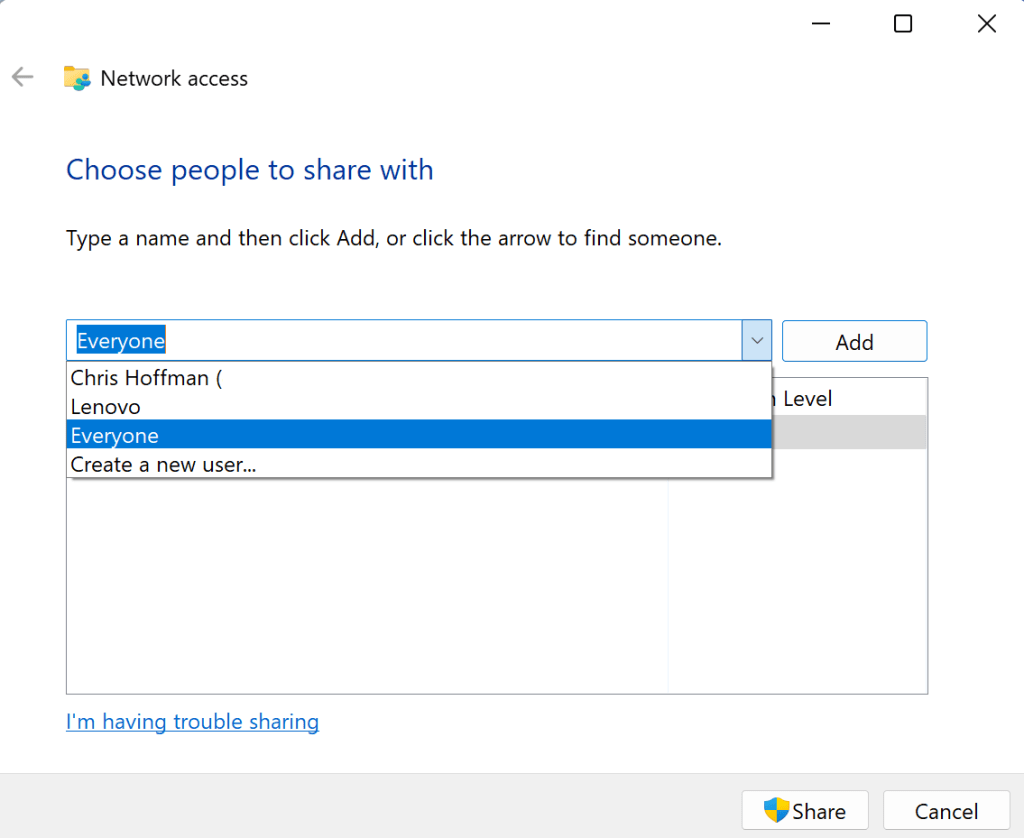
Microsoft recommends sharing a folder with “Everyone” on your home network for maximum simplicity.
Chris Hoffman
You can now open File Explorer on another PC on your network, click “Network,” and double-click the name of the PC sharing the files — and you’ll find the shared files. I successfully used this method to share files between Windows 10 and Windows 11 PCs with no further configuration.
As the name implies, this will share the files you choose with everyone on your network, so act accordingly. The files will only be shared when you’re on a network marked private, however — so just be sure to leave public Wi-Fi networks marked public in Windows after you connect.
This is an easy way to quickly and easily set up file sharing on your home network without any concerns about usernames, passwords, and access rules.
Use network-attached storage or USB drives
Sometimes, the old ways are best. In many cases — especially with modern, lightning-fast USB drives — it might be faster to plug an external drive into one computer, copy files to it, and then move that drive to another computer. A large, fast, inexpensive USB drive may be all you need. If you go this route, you won’t have to worry about networking issues at all.
Another option is to rely less on Windows file sharing and more on a dedicated network attached storage device, also known as a NAS. Your NAS becomes your primary network-attached file server. Unlike your PC, the NAS is always on, storing files and making them accessible to all your computers — and it will use less power than a PC, too. NAS hardware is also packed with other features — for example, a NAS could function as a networked media server you can stream media from or even let you access those shared files over the internet. You can also use your NAS as a backup location for your PC.
While it’s true that Microsoft nudged HomeGroups aside to make way for a greater emphasis on OneDrive cloud storage, it’s also true that many computer geeks who would have previously used HomeGroups on Windows now rely on NAS hardware instead. If you want to have a big network file share the old-fashioned way, NAS is your best option.
Get even more Windows PC tips and tricks with my Windows Intelligence newsletter — three things to try every Friday and free Windows Field Guides as soon as you sign up!


