Your Steam Deck is the beating heart of your everyday gameplay. It’s fast, powerful, and is packed with features and customizations. Regarding the latter, did you know that you’re actually able to customize your Steam Deck’s controls? Doing so isn’t overly difficult, but a little know-how goes a long way.
To that end, we’ve put together this guide to teach you how to re-map and re-tool your Steam Deck controls as quickly and easily as possible.
How to customize the controls on Steam Deck
Steam Deck’s controller settings, officially called Steam Input, can be accessed in-game at any time. Since Valve is still pushing updates to add new features, including Steam Input features, it’s a good idea to connect your Steam Deck to your network and see if it has any updates to apply before beginning.
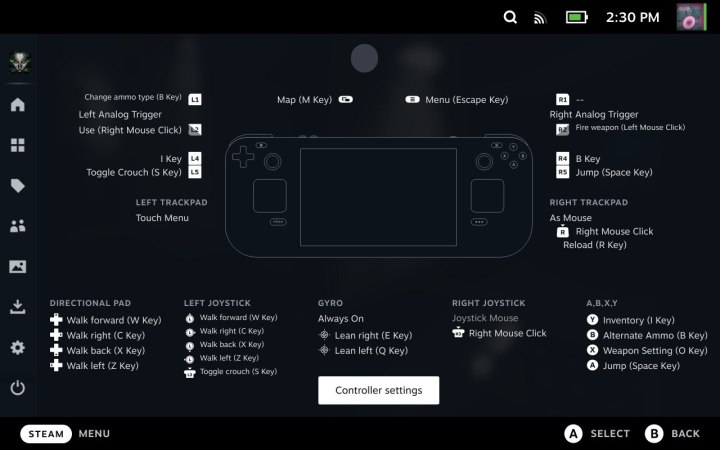
Step 1: In a game, press the Steam button, which is located on the left side of the Steam Deck, opposite the Quick Access Menu button on the right. Move to the right using a joystick or D-Pad, and the screen should switch to a layout of controls for the game. At the bottom, you’ll see a button that says Controller settings. Select it.
Digital Trends
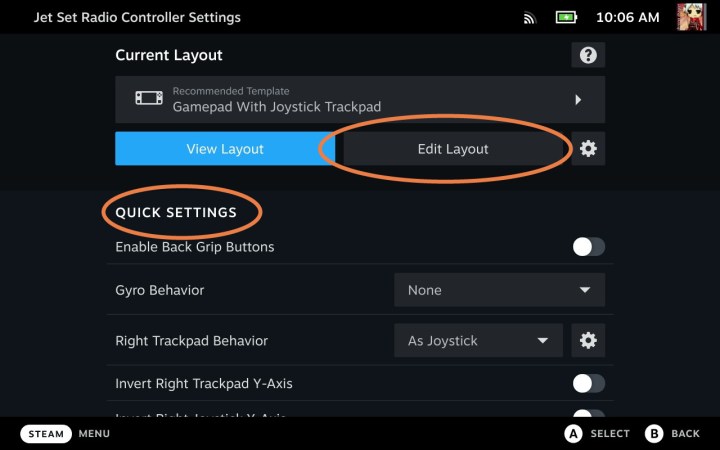
Step 2: You’ll see that you have a lot of options here. Let’s start with Quick settings first. Here, you will find basic options to make key changes to how the controls work. You can enable or disable the back grip buttons as you please, invert different axes to match your playstyle, turn the gyro sensor on or off, and more. These are important controller settings that you can find in many games, and they’ll allow you to fix blatant issues.
via Steam/Chronos / Steam
Step 3: If you have more in-depth customization in mind, look at the section called Current layout. Here, you will see the name of the current layout, and you can choose View layout to examine it more closely. To change it, select Edit layout.
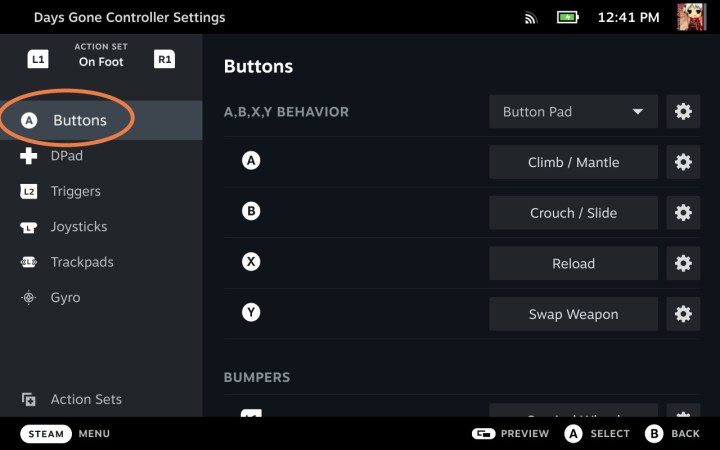
Step 4: Look at the left-side menu to see which part of the controls you are customizing. Let’s take a look at button mapping, which is one of the most common forms of control customization. With Buttons selected on the left-side menu, you will see button categories on the right, including Buttons and Bumpers. Choose the specific button that you want to change.
Digital Trends
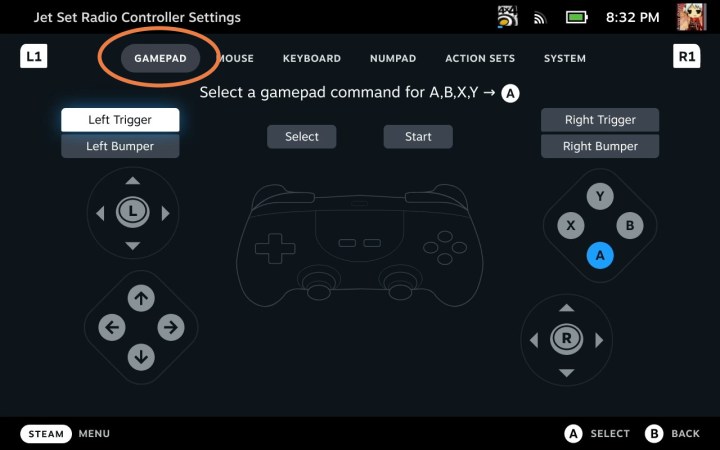
Step 5: Now the Steam Deck will show you a list of button commands that you can map to the specific button you chose.
First, look up top. Here, you’ll see a variety of formats depending on the controls you are using. If you’re on the Steam Deck or an external controller, sticking to Gamepad is fine. But if you ever want to play a game with a mouse or keyboard, you can switch to those formats during your customization.
via Steam/Chronos / Steam
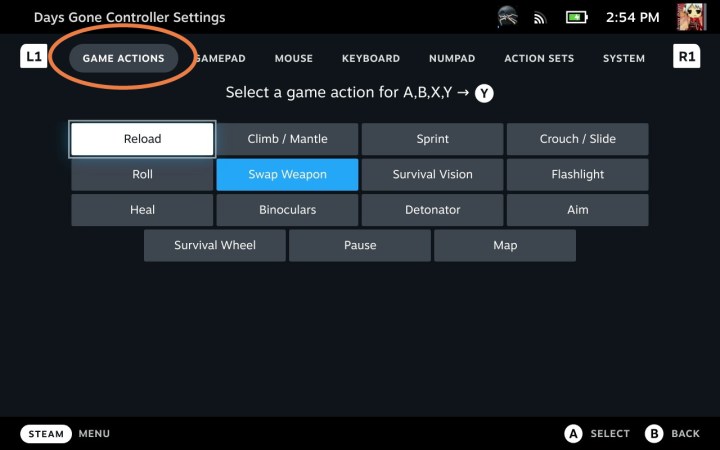
Step 6: Choose the command you want for your select button. You can remap it to any other button on the Steam Deck, including the trigger and bumper buttons, and even a directional button. Some games will have extra formats like Game actions that you can choose to map a specific action (rolling, sprinting, crouching, weapon swapping, etc.) to a button. If that’s how you prefer to customize, make sure you select Game actions on the top menu.
via Steam/Chronos / Steam
Step 7: Note that you can also customize the D-pad, triggers, joysticks, trackpads, and more. This allows you to adjust the sensitivity for many of these controls or change what menus they access, what a double-press does versus a single press, and more. It’s easy to get into the weeds here, but if you want to experiment, you can spend a lot of time tweaking how things work until you find a style of play that fits you perfectly.
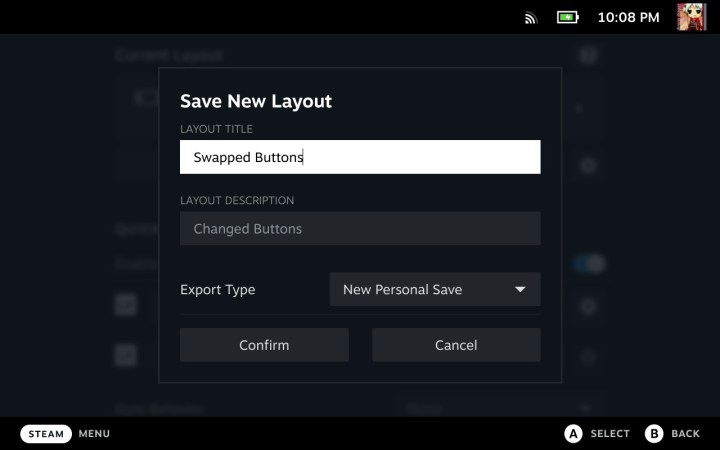
Step 8: Load up your new layout when you are finished, and select the Cog icon to the right in your Controller settings. This will give you the option to Save new layout, where you can name the layout and describe it so you know exactly what you created.
Pay attention to the Export type section: If you want this layout to be available for any game that you play, switch the type to Template. Otherwise, you can leave it on Personal save, which will affect this game only.
Select Confirm when you are finished. Now you can keep this layout chosen or switch back to it in this game whenever you want.
Digital Trends
Now you’re ready to customize controls for any game you want. You may also be interested in learning how to run emulators on the Steam Deck, and it’s a good idea to learn how to access the Desktop Mode, too!
Editors’ Recommendations


